My Retouching Process
One of the hardest things for people to judge about photographs is how much or how little post-production work went into them. It's a bit easier if the photo is obviously over-the-top-retouched in Photoshop or created from several sources to be a piece of fantastical art. But for portraiture, images that often look very natural could have hours upon hours of production work go into them. And every established photographer has their method, which produces a consistent look & style to their images.
Every great image starts with being well-exposed and properly captured in-camera. I don't care what your uncle or friend has told you, you can't make a badly exposed photo look stunning just because you bring it into Photoshop. You can however, adjust things like white balance and cropping pretty easily (which is one of the reasons my photos are never quite straight in-camera.. sigh).
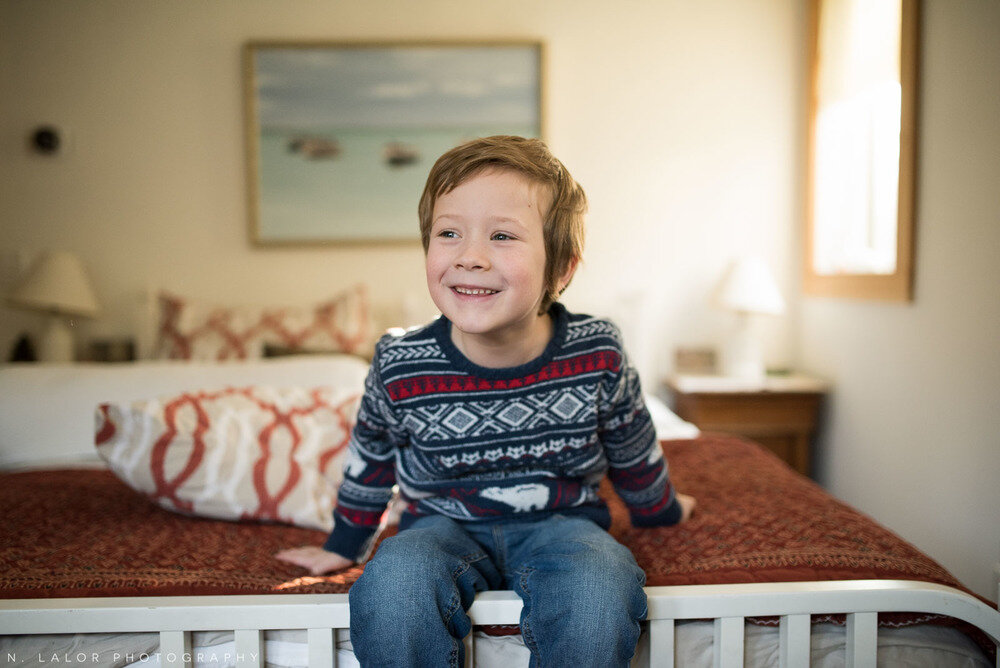
For the purpose of demonstrating my process, I selected a photo of my older son Graham which I took over the Holiday break (below). Because I often use AUTO white balance when I move around a home quickly (and in this instance, there were various light sources to consider as well), you can see that my camera did fairly poorly with the color. It's not terrible, but it is way too green.
I use Lightroom first. I correct and warm up the colors, straighten, crop, and make a few adjustments to bring up the shadows and tone down the highlights (all of this is "non destructive" in Lightroom). This process actually requires quite a bit of skill - to know what to change and how much to change it takes years to master. Lightroom offers a slew of glittery adjustment options, so it takes a great amount of self-restraint not move every dial to "improve" the photo.
The photo looks pretty good, but this is really just the start. This is the clean slate - this photo is now ready to go into Photoshop.

In Photoshop, I run a custom Action that I created over the years to add all the layers I need to edit the photo. It's not the cleanest by any means in terms of layer naming, but it works for me as I have exactly what I need to go through my process.
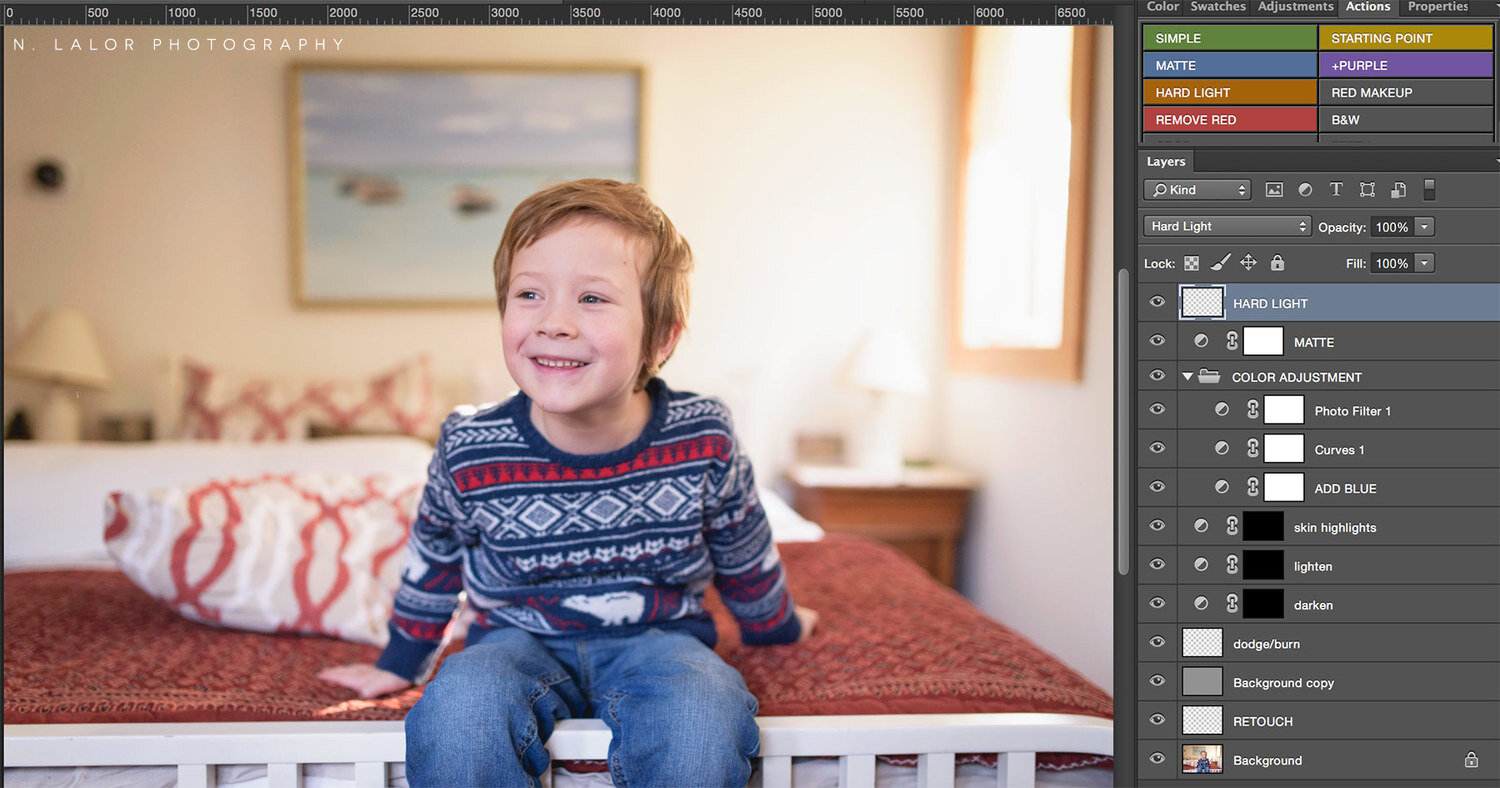
I start by adding a bit of a highlight where the light is pouring through the window.. and move on to the first layer of interest: RETOUCH.
I retouch skin by hand, without the use of plugins or actions, to have the most control. Not much is needed for kids with pretty perfect skin and I mostly focus on cleaning up Graham's red blotches and getting rid of his under-eye bags. I am careful to keep his birthmarks and freckles. For client images, I often remove distracting objects from the background too - things like a corner of a lamp or an electric face-plate that's not doing anyone any favors. And in this case, I removed the Nest thermostat that is a big black circle on the top left.. because it bugged me.
The layer above that.. that's my method of sharpening using a simplified "frequency separation" approach. It's slightly magical and a bit complicated, so really all you have to know is that it gives me the most control over how sharp an image is and maintains all the details that would otherwise be lost when retouching skin. It's pretty awesome and I love the fact that skin doesn't end up looking plastic or overdone when I use it.
And then there's the "dodge/burn" layer for adding a little highlight to the eye. This is also done by hand with the brush tool and carefully monitored to not go overboard (which, trust me, is so easy to do).
If teeth are showing, I also have a custom Action to whiten them. I didn't really need to use it in this case, but I did want to mention it.. because my method uses 3 layers that specifically target yellow in the teeth, bring up the brightness, and bring down the vibrance (and I'm kind of proud of having developed it). None of this is automatic, either. The layers provide a base which I then use to hand-brush over the area I'm addressing. Teeth are one of those things that a lot of people over-do by simply applying brightness.. so it's important for me to make sure everything looks natural.
Here is the result:
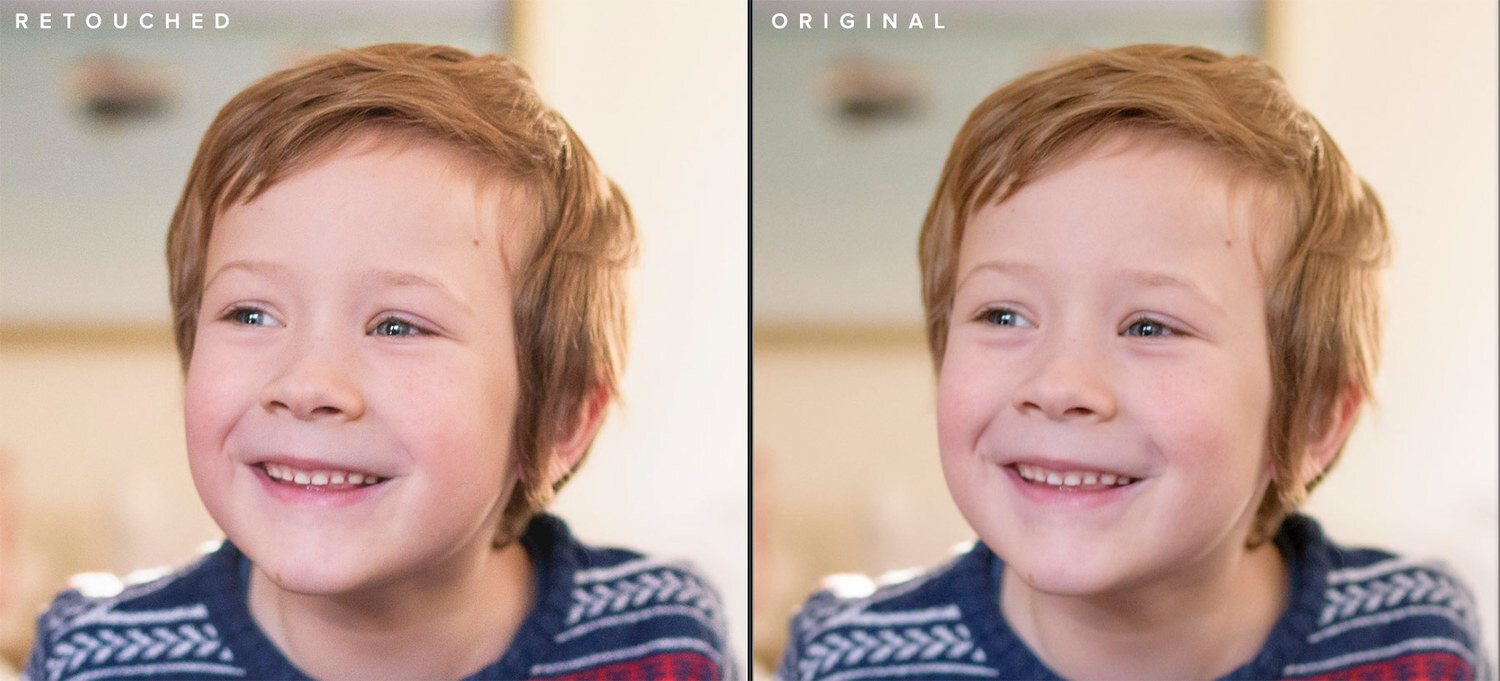
Sometimes images require a much more drastic skin correction, but luckily Graham doesn't need much at all. As you can see, the retouched version is sharper and his under-eye bags don't pop out at you anymore. It's all about finesse and restraint. I want Graham to look like himself.
I then have three Curve adjustment layers to work with after that... for bringing up the highlights and darkening shadows. This method is a lot more fine-tuned than using the dodge/burn layer and is, once again, done creatively, by hand.
After that, the image is basically done. My custom Action applied the necessary color treatment to the photo (COLOR ADJUSTMENT folder) and added just a bit of matte coloring (MATTE layer) to add a feeling of film processing.
And here is the final image of Graham:
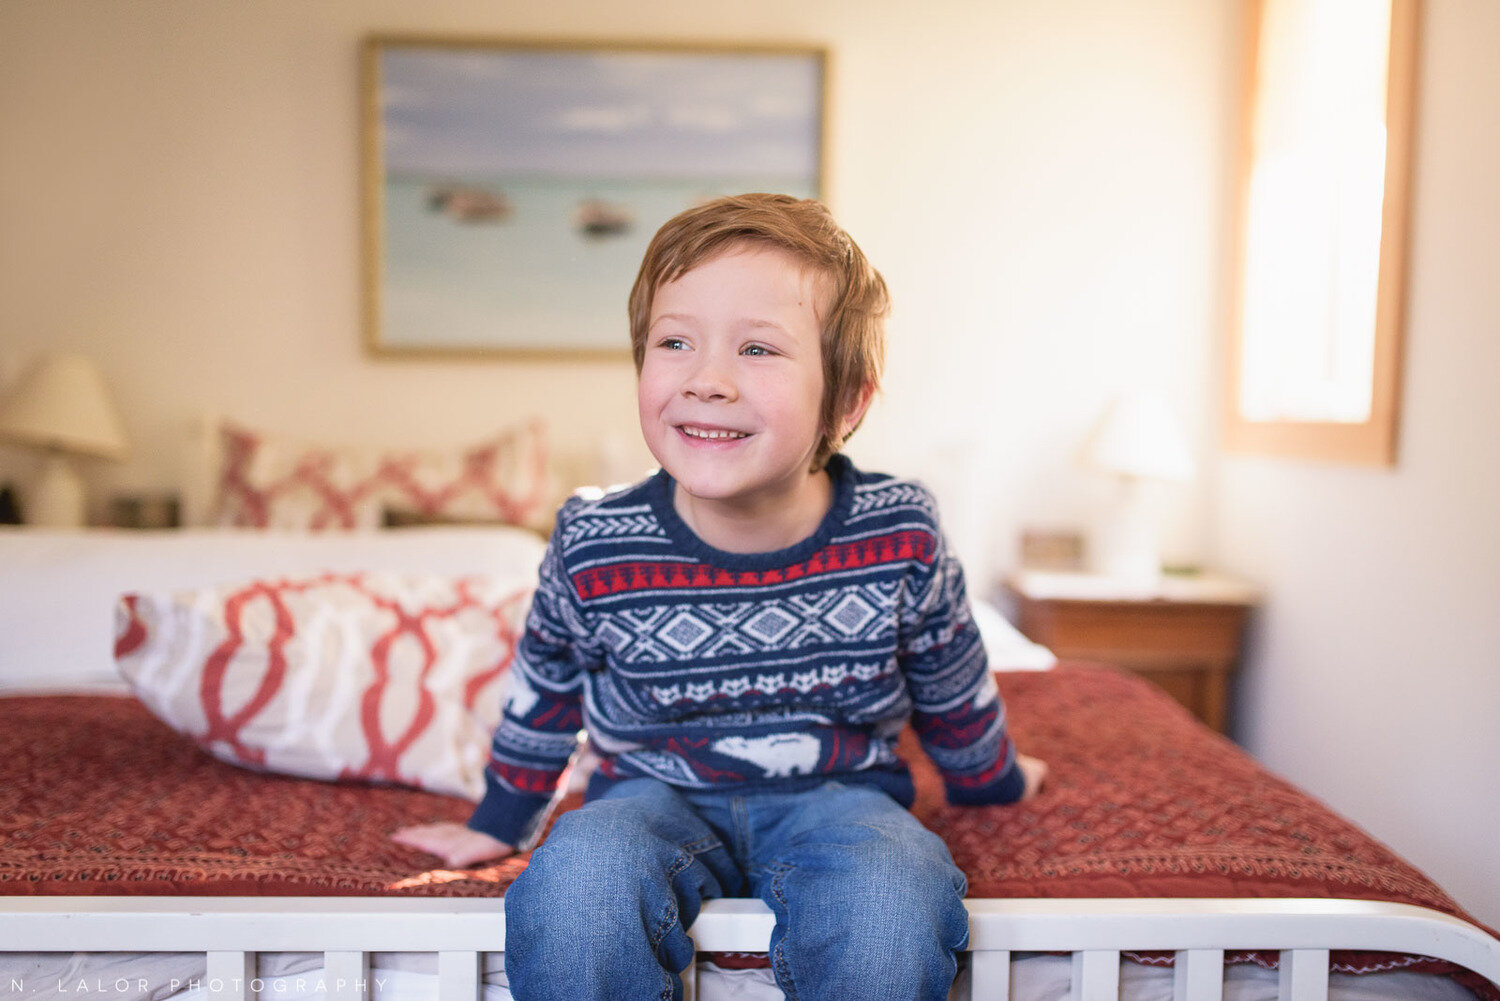
My intent is always to enhance the original photo.
A lot of people think that retouching/Photoshop is completely evil and changes the whole look of the image, but it certainly doesn't have to be that way! I use retouching to help bring a flat still image to what it looked like in real life. With a moving 3D subject, we don't notice little skin blotches, dark circles, or imperfections like we do in a still photograph. Our attention isn't swayed by distracting objects in the background when we observe a person in front of us, but once you capture the scene with a camera, the perception of the image changes.
My process for retouching images with adults (women and men) is a bit more involved. It requires a keen eye to determine how much camera distortion to take away. What to correct and by how much. In the end, all of my photos go through a lengthy process that makes them look completely natural and effortless.
It's important for a photographer, an artist, to finely craft each image following their own individual process. I certainly don't have to go as far as I do.. in fact, most of the time, the image I start with is already "good enough". But I feel that it's important for me. That extra bit of retouching, of bringing the image into Photoshop and going through all the layers is what creates the final artwork. It's what makes my photographs my own. And that perfection is what drives me to create better and better images in the end.