Product Photography Hacks and Tips
A lot of the time, small business startups opt to do their own product photography, at least in the very beginning. There’s definitely nothing wrong with that, and if you’re trying to keep things financially lean, it’s a good way to go about things. I see way too many horrible product shots that show a glaring lack of professionalism - in an age where we all have superb cameras in our hands as part of our phone, there’s really no excuse.
While I do have a mobile kit for product photography for professional purposes, there’s no reason why you can’t hack some great product photos until you get to the point where you can afford to hire a professional.
So here are some tips (which can also be used for product photography for Instagram, btw, not just your web store) that will help you get a more professional look in your product shots.

1. USE NATURAL LIGHT
You don't need a fancy lighting setup for good product photos. In fact, most of the time, natural light works better than cheap lights you bought off Amazon - the problem with cheap lighting kits being unstable color temperature, low output, and lack of diffusion to create a soft flattering light.
Instead of investing in some cheap kit, you can use any window you have in your home. Now, some windows work better than others. Anything on the second floor will be better than the first floor because you’ll get more light and less color casts (more on that later). Try to pick a window that doesn’t have direct sunlight streaming through it, unless you’re going for that specific look. And try to photograph your products during the same time of day and under the same sun conditions for all your products - for instance, if it’s sunny or cloudy, etc.
Set up a table or use the floor next to the window to set up you product shooting space and use the tips below to control that light just as you would any artificial light source.
2. UTILIZE A REFLECTOR
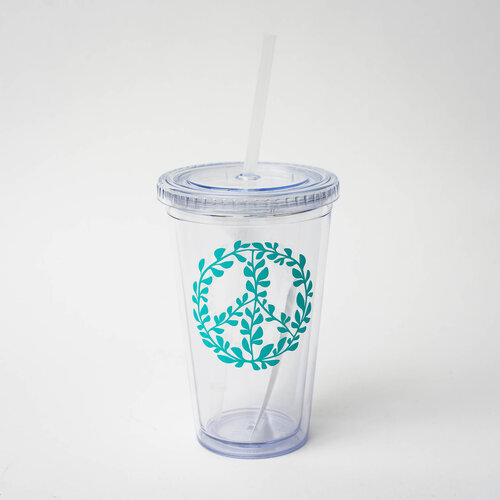
Once you have your window (which is you main light), you can soften the shadows by using a reflector. This can be a white piece of paper, a white board, or anything else that's white and rigid enough so you can hold it on the shadow side of the product you're photographing. A reflector is really useful because you can lighted up a side of the image and literally bounce the light from your main light source back into the scene. Alternatively, you can also use a black board to remove light and create a moodier image. This is all part of controlling those shadows and making the light do what you need it to do in the image.

You can tell what the quality of light is by looking at the shadows. In this image, the shadows are soft, but if you don’t diffuse the light, you will get hard shadows.
3. DIFFUSE THE LIGHT
Pretty much all light can benefit from diffusion (unless you're going for a hard light look). To diffuse the light, and make the shadows softer, use a simple white curtain on your window. Please note that this will decrease the amount of light coming through the window, so plan accordingly. I suggest using a cotton or linen curtain - nothing too sheer or opaque/heavy. Make sure the color of the curtain you’re using is truly white as well - this helps correct the color of the light that streams through the window, which brings us to…
4. KEEP AND EYE ON COLOR TEMPERATURE
Every single wave of light has a specific color temperature (this has to do with the wavelength) and the color of sunlight changes depending on the time of day and environmental conditions. This is why our cameras all include a “white balance” setting, which is a way for us to tell the camera how it should render the color of the light we’re photographing. You don’t need to worry about this setting if you’re using an iPhone (since it’s not an option that’s readily available), but it’s definitely something you can adjust after the fact to correct any color temperature shifts in the image.
The other thing to keep in mind is that light also picks up the color of items it bounces off of, like floors, furniture, grass, or walls (which is called a "color cast"). If you're photographing your product and your images have a green hue, check that the light isn't coming through the window after being reflected off green grass. You can notice this color cast by looking at the image after taking the photo. A curtain will help filter some of this as mentioned above, but you’ll still want to be careful about photographing in a room that will bounce weird color into your images.
5. MAINTAIN CONSISTENCY
The biggest difference between amateur and professional photography is consistency. That means how bright/dark an image is, the color temperature (whites should always be white), and quality of the image. You can have better consistency when you color-correct your photos (click on the white portion of your image to set a neutral white balance) and take them during the same time of day under the same lighting conditions. Most of all, being aware that having consistent images is something you should be keeping an eye on is the key to getting better product photographs than you would otherwise.
6. BACKGROUND PAPER
A lot of times, the background is what really ruins a product image. A lot of people who want to hack things together will use a white sheet (oh, the wrinkles!), a white wall or table, or an outdoor setting (hello inconsistency). You definitely want to make sure whatever background you’re using is to a high enough standard as to not distract from your product. Wrinkles are distracting.. which is why photographers use a special backdrop paper that’s both thick and evenly colored for product shots.
But you don’t need to be a photographer to get it, and you can find it on B&H here: https://www.bhphotovideo.com/c/product/45607-REG/Savage_1_1253_Widetone_Seamless_Background_Paper.html for about $35 per roll (please note that prices have been steadily rising over the years, but it’s still very much an affordable price point!). This “seamless background paper” comes in all sorts of colors, and of course the standard white (there are several white options actually), so you can select a color that’s unique for your business if you like.
I hope you got a lot of useful info out of this Blog post, and if you have any questions or comments, please feel free to leave them below. I would love to hear from you!