Behind the Scenes: Portrait Lighting
There are so many ways to do Studio portraits, but lighting truly makes the biggest difference. My lighting method, as it happens, is a bit unique. In fact, as with everything, my approach to lighting is to make things as simple and easy as possible. The biggest thing that might set my way of lighting for portraits apart from other Photography Studios is that I use the entire space to create the look I want. Want to know more? Read on..
Light Should Make You Look Good
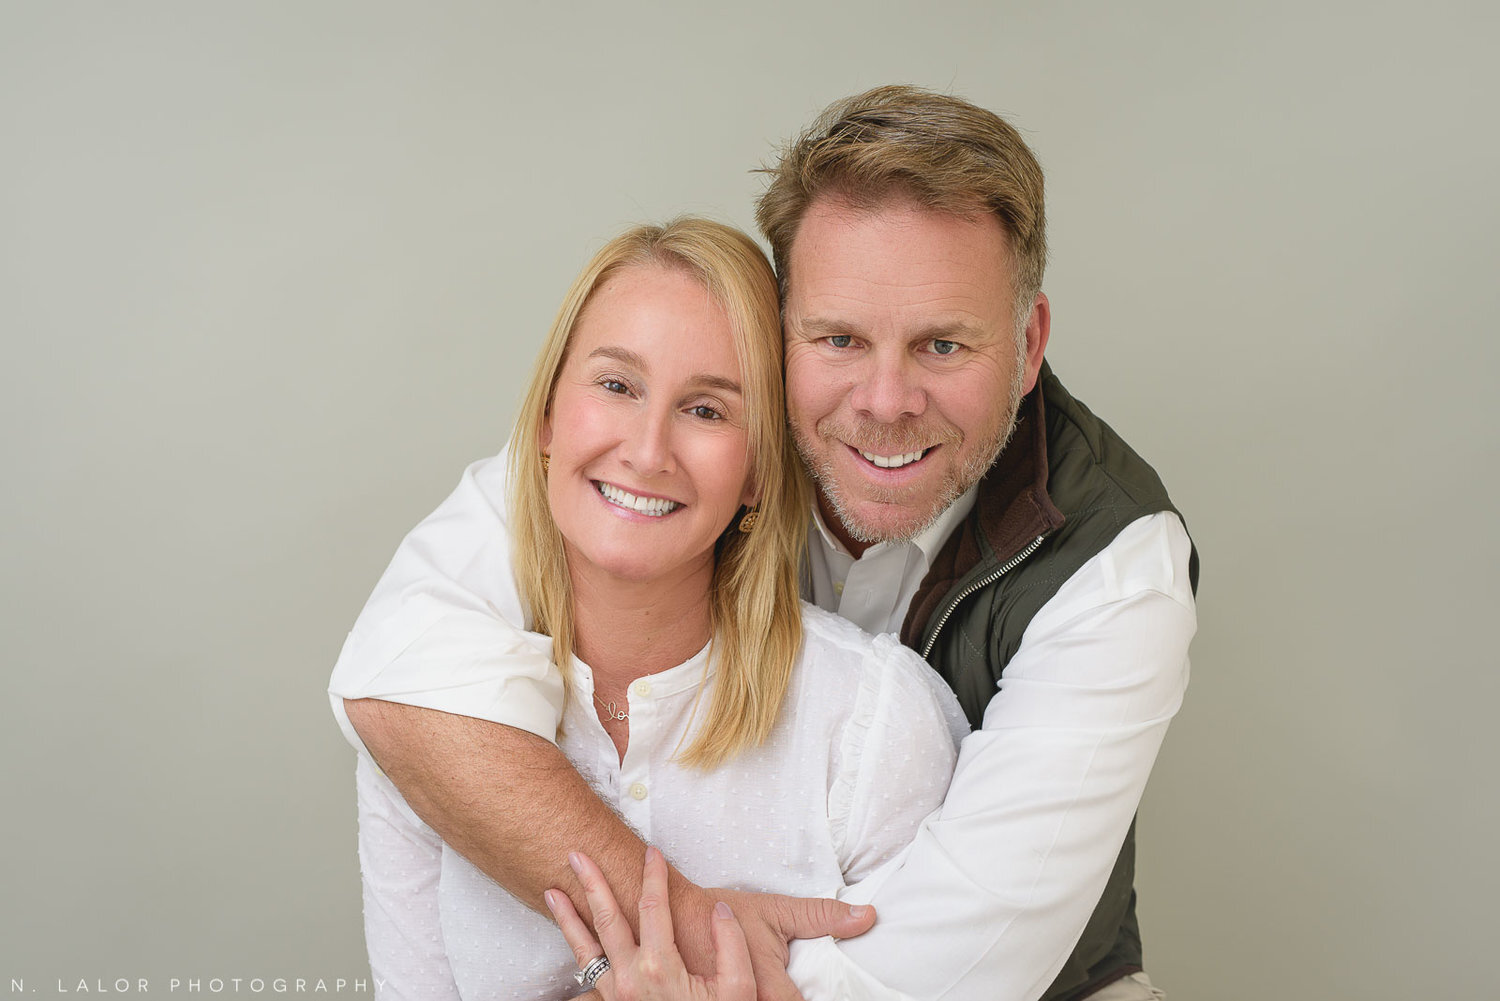
Here’s the thing about Studio lighting. A lot of the time, It’s meant to look good when photographing models. That means dramatic lighting will usually make an average person look worse, not better. Models know how to pose. They have tiny pores and perfect skin. They look gorgeous at every angle.. and none of that applies when it comes to regular people! Not to mention us, tired overworked parents who haven’t slept in 8 years (feel free to insert whatever age your oldest child is right now).
Traditional photography rules will tell you to light a subject a certain way, shaping light to create shadows on a specific part of the face. But in reality, so called “flat lighting” is often the most flattering for portraits. As photographers, we sometimes get so caught up in being experts in our field that we forget to make decisions based on what’s best for our client. I love the way a soft front light fills in all the wrinkle lines on a person’s face. There is no substitute for it, and it’s why selfies look best taken facing a window (try it!).

Mixing Natural and Artificial Light
My Studio has three South-facing windows. It was the first thing I noticed about the space. But relying only on natural light (that’s the light that’s coming from the sun, for everyone reading this who isn’t a photographer) isn’t ideal because it’s unpredictable. On a cloudy or rainy day, it’s hard to get a crisp image. Consistency is also difficult as the color and intensity of the light changes throughout the day, and even in a span of minutes if clouds are in the sky.
This is where “artificial light” comes in.
What I found as the best solution is to mix the natural sun pouring through my windows and artificial light coming from my Profoto D2 strobe (which I love, btw!). Mixing the two does a couple of things. First of all, you can create a much more natural image.. because after all, the light coming from the sun is the way we see the world every single day. Gloomy days are not an issue because the strobe will provide the bulk of the light needed. And there is full control of the resulting photograph because while I can’t control the sun, I can certainly control my artificial light.

Using the Space
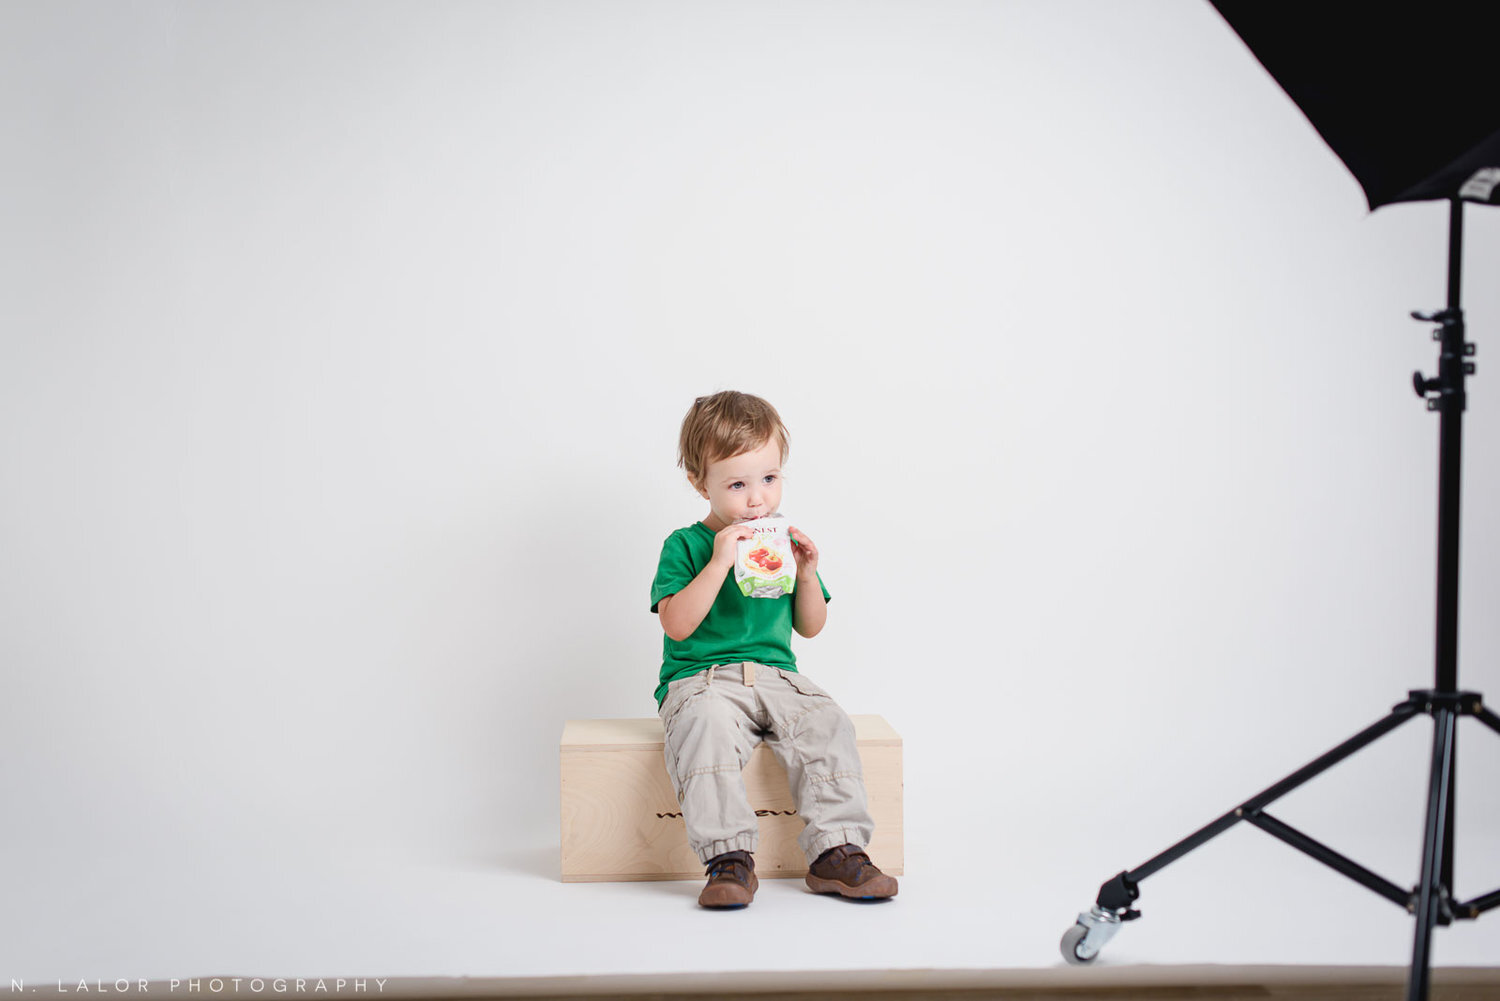
For anyone who has been in my Studio, you know it’s a cozy space with no square foot wasted. But it does present some challenges. A paltry 8 feet of ceiling height means the luxury of using gigantic light modifiers isn’t available (although I sometimes do anyway). The dedicated shooting space is limited, as is the spot where my light goes. So instead of trying to do what everyone else does, in a space that doesn’t necessarily support it, I simply don’t use any modifiers at all. This means that my light takes up about one square foot of floor space.
And my solution for creating beautiful soft light is to bounce it off that unacceptably low ceiling I mentioned earlier. In fact, I use the entire room as my “modifier”.. which often leads to my clients asking why the light isn’t pointing at them at all. Some of the advantages of this approach are no glare/reflections in glasses, beautiful soft light that’s flattering for most people (see above), and the ability to easily move my light to make quick adjustments on the fly (see below).
In the end, what it comes down to is knowing the space you’re working with. And most of all, knowing how to use it for the best benefits.

Adjusting for Each Person
What I’ve found over the years is that every person’s face is different. What might be ideal lighting for one person, can make another person’s face look flat and wide. If a person’s eyes are deep-set, having a light that’s too high will create deep shadows under the eyes (or, “raccoon eyes”).. but for someone else, having the light coming from above really shapes their face and makes them look amazing.
So you can see why adjusting the light can be pretty important.
I am constantly moving my light around for each family member. Where my strobe should be placed on a cloudy day is different than where it should go on a sunny day. A large family group will require different light than a small group of three people. And the trick is to do all this quickly, because nobody wants to wait around while the photographer is fussing with the lighting. This is why my light is so easy to adjust and move around - it takes about 30 seconds to get it into any position I might require and doesn’t require any assistants for setup. And yes, that took years of learning and lots of practice, but I’m sure you already knew that there are no shortcuts when it comes to this stuff.

Throwing Old-School Rules out the Window
There are photography rules for where lights should be placed. There are ways to use a 3-light system, a 2-light system, and a 1-light system to achieve specific results. The problem (at least for me) with these diagrammed rules is that they produce the same type of Studio-looking image we’ve seen for the past 50 years. There are plenty of photographers who have gone through traditional schooling and can precisely achieve that textbook result every time.
I personally feel that portraits should be a bit more natural and that lighting shouldn’t be so idealized and perfect. I prefer something more akin to sunlight coming through a window, but with a bit more crispness and consistency. Which is why throwing the old-school rules out the window works for me. I can’t do my work any differently, and I strive every day to be better at my craft. And most of the time, that means listening to what speaks to me vs what everyone else is doing.
The one thing I want to stress about all of this is that figuring out my lighting took a very long time. I started out as a “natural light photographer”. I transitioned to photographing families in their homes with a flash because I couldn’t stand grainy images that resulted from low-light settings. I learned to control my light with the simplest equipment because children move around and you can’t rely on them slowing down (or take time to set up lights). It’s a methodology I carry through to Studio work. It’s about problem-solving in the most creative way without complicating things so much that they can’t be flexible. And that’s exactly why I love to use everything I already have to create the best result I can.